Homemade Bread is a beloved staple for many, and for good reason. There's truly nothing quite like a warm slice of fresh bread topped with a thick pat of butter. This recipe offers a perfect balance of simplicity and deliciousness.
Learning how to bake bread at home is easy with this method, which takes about 2 hours and yields 2 loaves of wonderful bread. The versatility of the recipe allows for variations, such as using part whole wheat flour for a heartier texture.
Ingredients Needed For Making Bread Recipe
Warm Water
This is the first essential ingredient in bread recipe easy. The water should be between 105-115 degrees Fahrenheit (40-46 degrees Celsius). This specific temperature range is crucial because it creates the perfect environment to activate the yeast. If the water is too cool, the yeast won't become active, and if it's too hot, it might kill the yeast. The warm water helps kickstart the fermentation process, which is vital for the bread to rise properly.
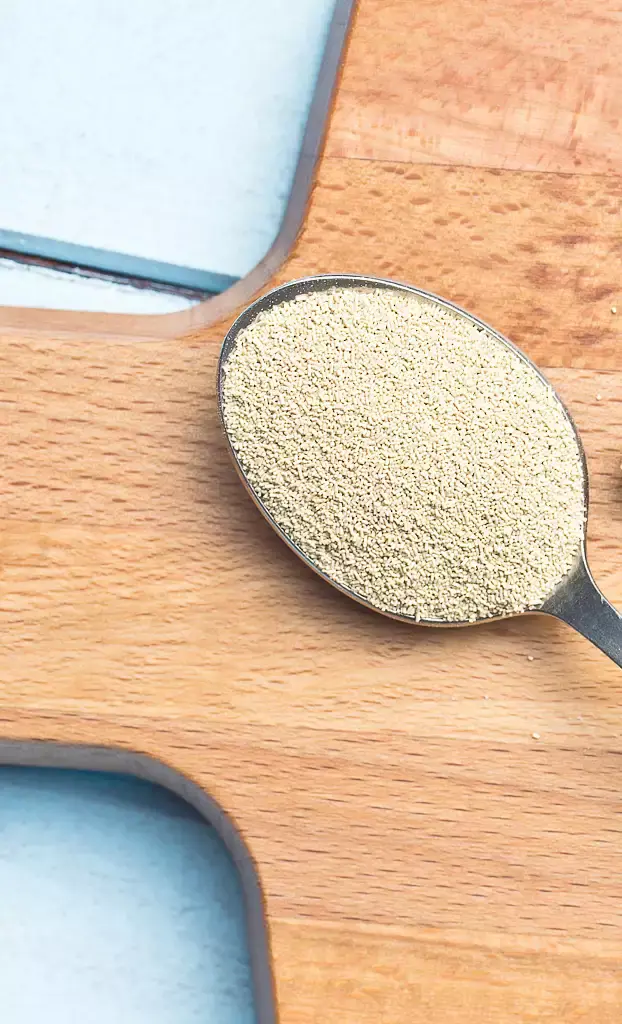
Yeast is the magical ingredient that makes the bread rise. It's a living microorganism that feeds on the sugars in the dough, producing carbon dioxide gas that creates air bubbles, causing the dough to expand. While this recipe calls for active dry yeast, you can also use instant or rapid rise yeast. If you choose to use these alternatives, please refer to the adaptation notes in the recipe card for proper substitution ratios.
Granulated Sugar or Honey
Either of these sweeteners serves two important purposes in this bread recipe. Firstly, it acts as food for the yeast, helping to activate it and promote fermentation. Secondly, it helps to tenderize the bread, resulting in a softer, more pleasant texture. The sugar also contributes to the browning of the crust during baking.
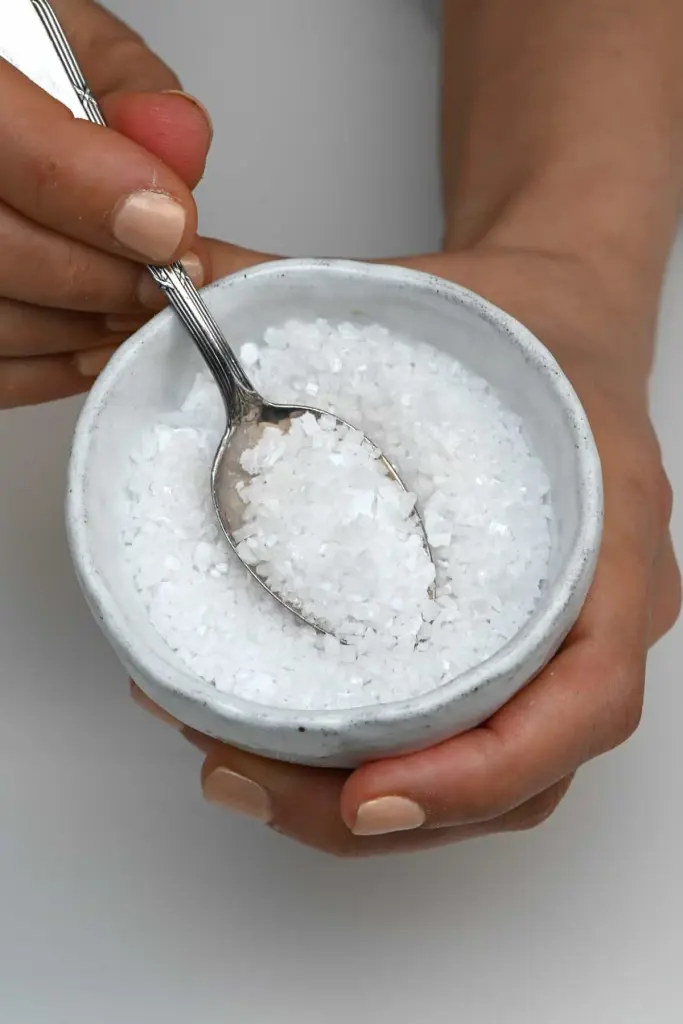
While it might seem like a small addition, salt plays a crucial role in bread making. It enhances the overall flavor of the bread, bringing out the subtle, wheaty notes. Salt also helps control yeast growth, ensuring a steady, even rise. Additionally, it strengthens the gluten structure, contributing to a better texture.
Oil
This recipe calls for vegetable or canola oil, but melted butter can be used as a substitute if preferred. The oil serves to enrich the dough, adding moisture and helping to create a softer crumb. It also contributes to the bread's shelf life, keeping it fresh for longer.
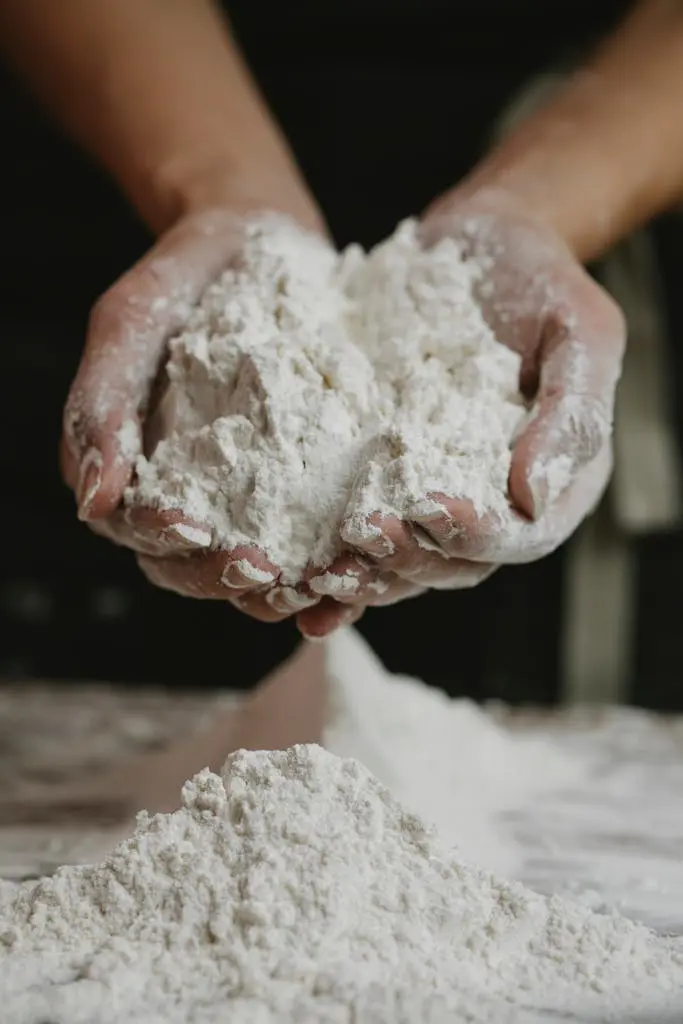
The main structural component of the bread, flour provides the proteins that form gluten, giving bread its characteristic texture. This recipe is flexible, allowing for either Bread Flour or All-Purpose Flour without any alterations to the recipe. The amount of flour needed can vary based on factors like altitude and humidity. The key is to achieve the right dough texture - it should be smooth and pull away from the sides of the bowl. Be cautious not to add too much flour, as this can result in dense bread.
How To Make Breads At Home
Ingredients
2 cups warm water
1 Tablespoons active dry yeast
1/4 cup honey or sugar
2 teaspoons salt
2 Tablespoons oil
4 - 5 1/2 cups all-purpose
Instructions:
Step-1: Activate the yeast
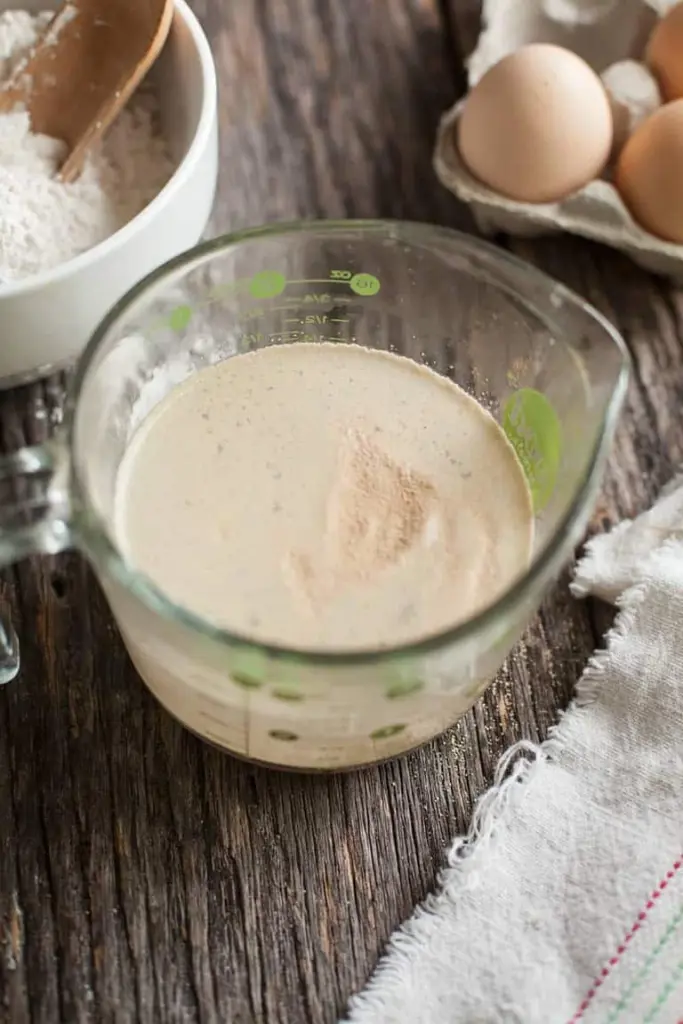
In a large bowl, combine the yeast with warm water (105-115°F) and a pinch of sugar. Let this mixture sit for 5-10 minutes. You'll know the yeast is active when it becomes frothy and bubbly.
This step for making bread is crucial - if the mixture doesn't foam, your yeast might be old or the water too hot, so you'll need to start over.
Add the remaining sugar (or honey), salt, oil, and 3 cups of flour to your yeast mixture. Mix thoroughly until well combined. Gradually add more flour, about 1/2 cup at a time, mixing between additions.
Keep adding flour until the dough starts to pull away from the sides of the bowl. The exact amount of flour can vary based on humidity and other factors.
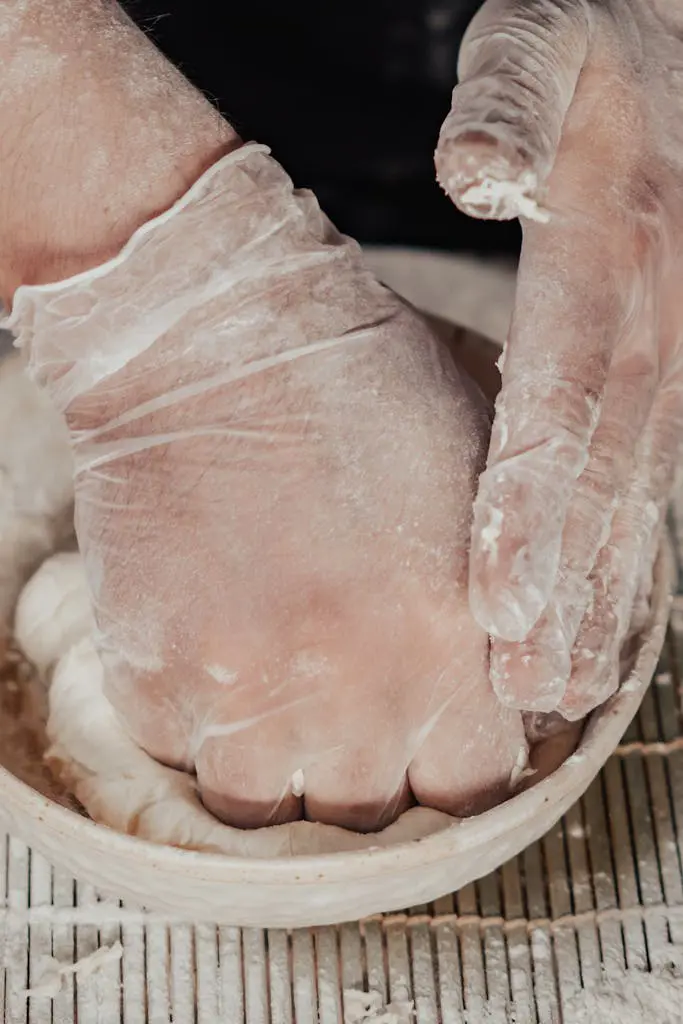
Step-3: Knead
If using a stand mixer, knead the dough on medium speed for about 5 minutes. For hand kneading, turn the dough onto a lightly floured surface and knead for 5-8 minutes.
You're aiming for a smooth, elastic dough that's still slightly tacky but not overly sticky. Proper kneading develops the gluten, which gives bread its structure.
Lightly oil a clean bowl and place your kneaded dough inside, turning it to coat with oil. Cover the bowl with a clean kitchen towel or plastic wrap. Let it rise in a warm, draft-free place until doubled in size, which usually takes about 1½ hours. The ideal temperature for rising is around 75-80°F.
Step-5: Shape the loaves
Once risen, gently punch down the dough to release the air. Divide it into two equal portions. Shape each portion into a loaf by flattening it into a rectangle, then rolling it tightly from the short end.
Pinch the seams to seal and place each loaf seam-side down in a greased 9x5 inch loaf pan.
Step-6: Second rise
Cover the pans loosely with greased plastic wrap to prevent the dough from sticking as it rises. Let the loaves rise again in a warm place for 45-60 minutes, or until the dough has risen about 1 inch above the rim of the pans. This second rise, also called proofing, gives the bread its final texture.
Step-7: Bake
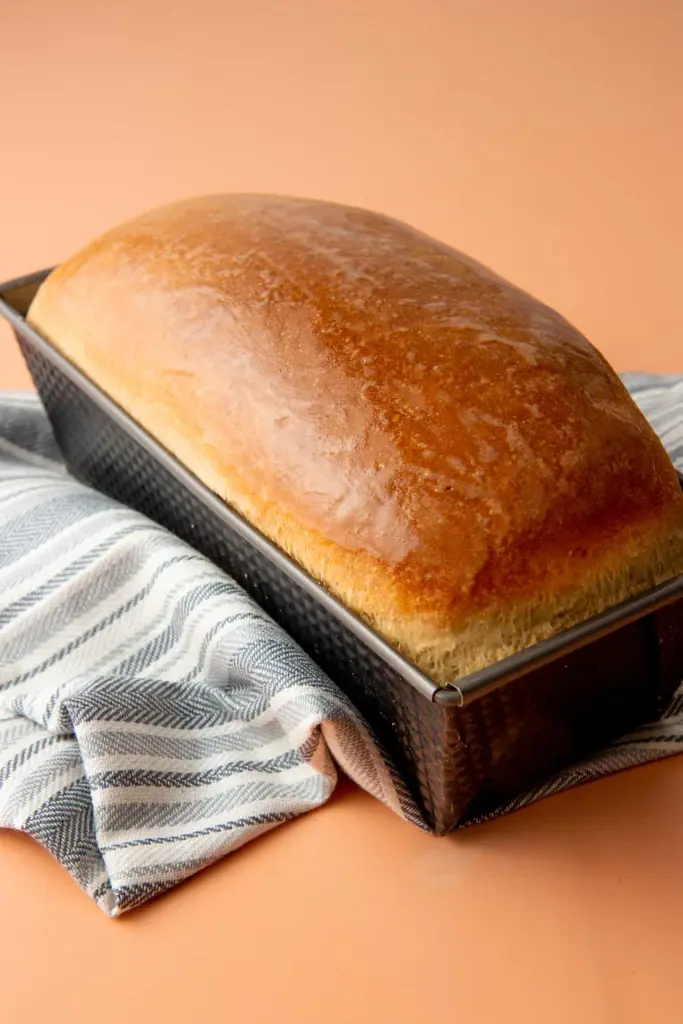
Preheat your oven to 350°F (175°C). Bake the loaves for 30-33 minutes. The bread is done when it's golden brown and sounds hollow when tapped on the bottom. If you have an instant-read thermometer, the internal temperature should reach about 190°F (88°C).
Carefully remove the loaves from their pans immediately after baking and place them on a wire cooling rack. If desired, brush the tops with melted butter for a softer crust and extra flavor.
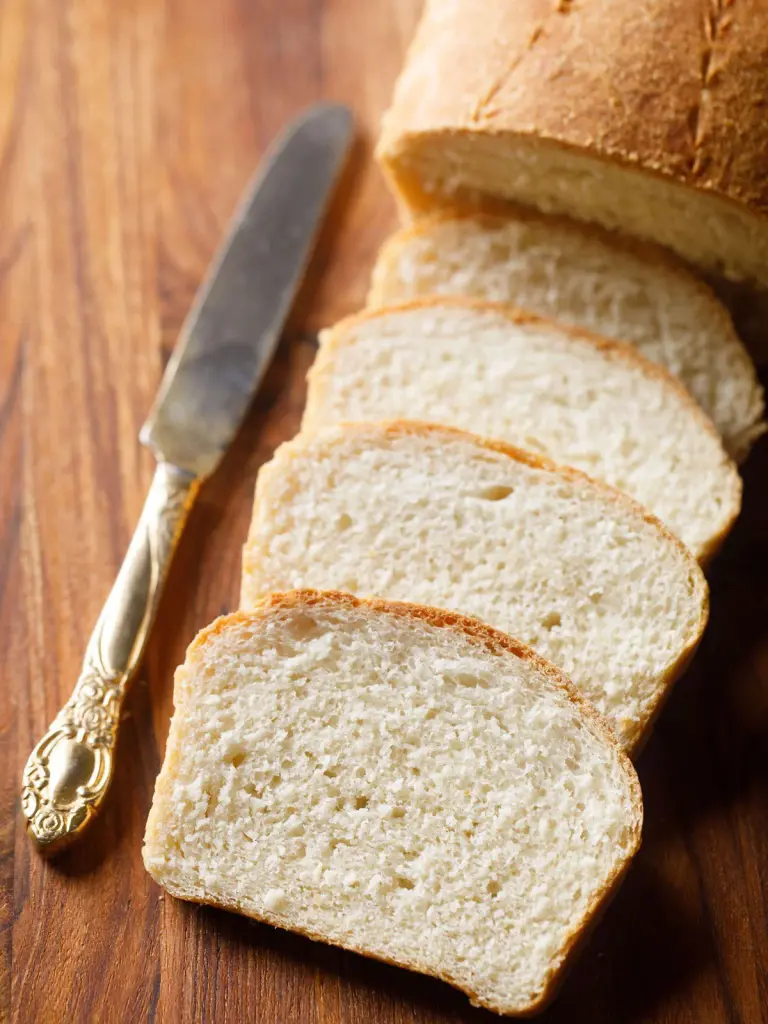
Allow the bread to cool for at least 15 minutes before slicing. This cooling time allows the structure of the bread to set, making it easier to slice.
How To Tell If The Bread Is Fully Baked
To determine if bread is fully baked, you can use a food thermometer. A digital thermometer is particularly convenient and easy to use. Properly baked bread should reach an internal temperature of 190-200°F (88-93°C).
For bread recipes containing milk, aim for 200°F (93°C). However, for recipes without milk, like the one mentioned, you can safely remove the bread from the oven once it reaches 190°F (88°C).
In addition to the internal temperature, visual cues are important. The top of a fully baked loaf should have a golden-brown color. This combination of temperature and appearance ensures your bread is thoroughly cooked and ready to enjoy.
Kneading is crucial for developing the bread's texture and flavor. Don't rush this step - the recommended 7 minutes of kneading time is important. As you knead, you'll feel the dough becoming smoother and more elastic. This process helps create the gluten structure that gives bread its characteristic texture.
2. Humidity and temperature
Humidity and temperature can significantly affect your dough. In moist climates, you might need to use more flour than the recipe suggests, possibly up to 1/2 cup extra.
The dough should be sticky but manageable after the first rise. While kneading, it should mostly pull away from the bowl sides, leaving them clean. Aim for the dough to still slightly stick to the bottom of the bowl. Be cautious not to add too much flour, as this can result in dense bread.
3. Be patient with rising times
Temperature plays a big role in how quickly your dough rises. In cooler conditions, rising will take longer. A handy trick for colder days is to create a warm environment in your oven.
Turn it on for 2-3 minutes, then switch it off and let your dough rise inside. This trapped warmth provides an ideal atmosphere for the yeast to work its magic.
4. Handle with care after the first rise
After the initial rise, be gentle with your dough. Overworking it at this stage can affect the bread's texture. Aim to knead and shape your dough in about a minute before placing it in the pan for the second rise.
A useful technique is to let the dough complete its second rise in the oven. This way, when it's ready to bake, you can simply turn on the oven without having to move the risen dough.
After your bread has cooled completely, store it in an airtight container or bag. At room temperature, it will stay fresh for 2-3 days. If you want it to last longer, you can refrigerate it for up to 5 days. Remember that refrigeration can alter the texture slightly, so you might want to toast refrigerated bread before eating.
Make-ahead options
These methods allow you to enjoy fresh homemade bread even on busy days. The make-ahead options are particularly useful for planning ahead for holidays or special occasions.
Refrigerating dough:
You can prepare the dough up to the first rise. Instead of letting it rise, place it in a large airtight container and refrigerate for up to one day. When you're ready to bake, let the dough come to room temperature, then proceed with punching it down and shaping the loaves.
Freezing shaped dough:
After shaping the loaves but before the second rise, you can freeze the dough. Place the shaped loaves in freezer-safe or disposable aluminum bread pans. Cover them tightly with a double layer of aluminum foil and freeze for up to 3 months. To bake, thaw the loaves at room temperature (about 5 hours) and let them complete the second rise before baking as directed.
Freezing baked bread:
If you've baked more bread than you can eat quickly, freezing is a great option. Let the baked loaves cool completely, then place each in a freezer-safe resealable bag. They can be frozen for up to 3 months. To use, thaw the bread at room temperature on your countertop, or leave it in the refrigerator overnight.
Variations On Basic Bread Making Recipes
With just a few tweaks or additions, you can create a wide range of breads to suit different meals or preferences. Here are some of the bread recipe simple that you should try:
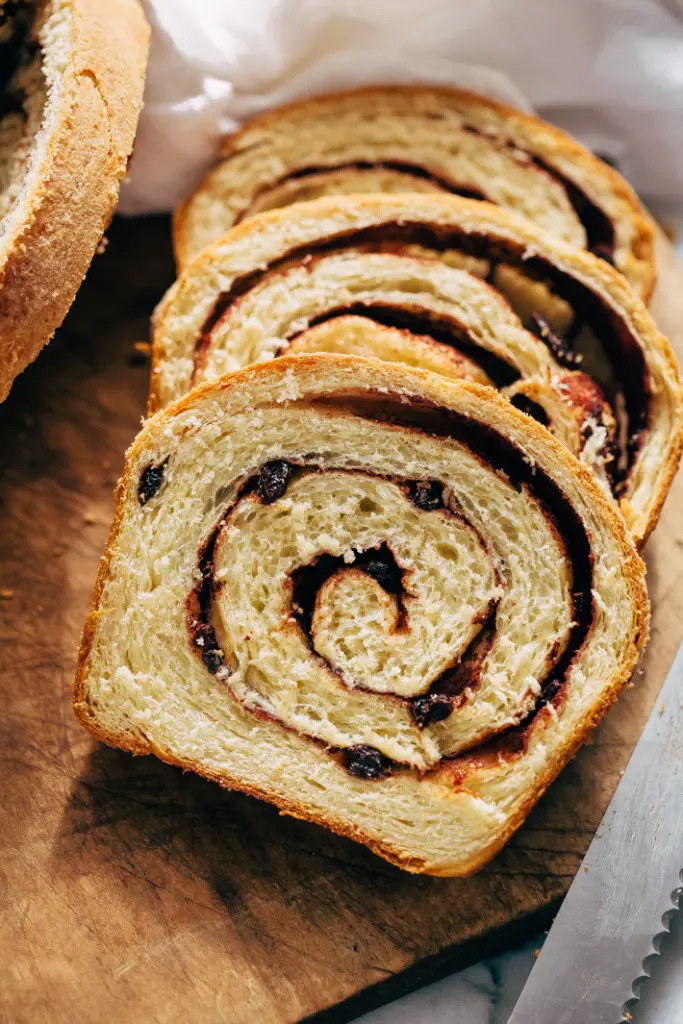
After the first rise, divide the dough and roll each piece into a large rectangle. Mix 1/4 cup sugar with 2 teaspoons of ground cinnamon. Sprinkle this mixture over the dough, leaving a 1-inch border.
Roll the dough tightly into a log, pinch the ends to seal, and place in the loaf pan seam-side down. This creates a delicious swirl of cinnamon throughout your bread.
2. Raisin Bread:
Add 2 cups of raisins to the dough during mixing. For an extra treat, combine this with the cinnamon swirl method above. The raisins add bursts of sweetness and a chewy texture to your bread.
3. Rolls:
Instead of shaping the dough into loaves, divide it into smaller portions and shape into rolls. These recipes to make bread are perfect for dinner or making sandwiches.
4. Breadsticks:
Roll the dough into long, thin shapes. These can be left plain or topped with herbs, cheese, or garlic before baking. They're great for dipping or as a side to soups and salads.
5. Whole Wheat Bread:
Substitute some or all of the all-purpose flour with whole wheat flour. This creates a denser, nuttier bread that's higher in fiber.
6. Artisan Bread:
Shape the dough into a round loaf and bake on a pizza stone or in a Dutch oven for a rustic, crusty exterior. You can add seeds or herbs to the dough for extra flavor.
7. Pizza Dough:
The basic bread dough can be easily adapted to make pizza. Roll it out thin, top with your favorite ingredients, and bake at a high temperature for a homemade pizza night.
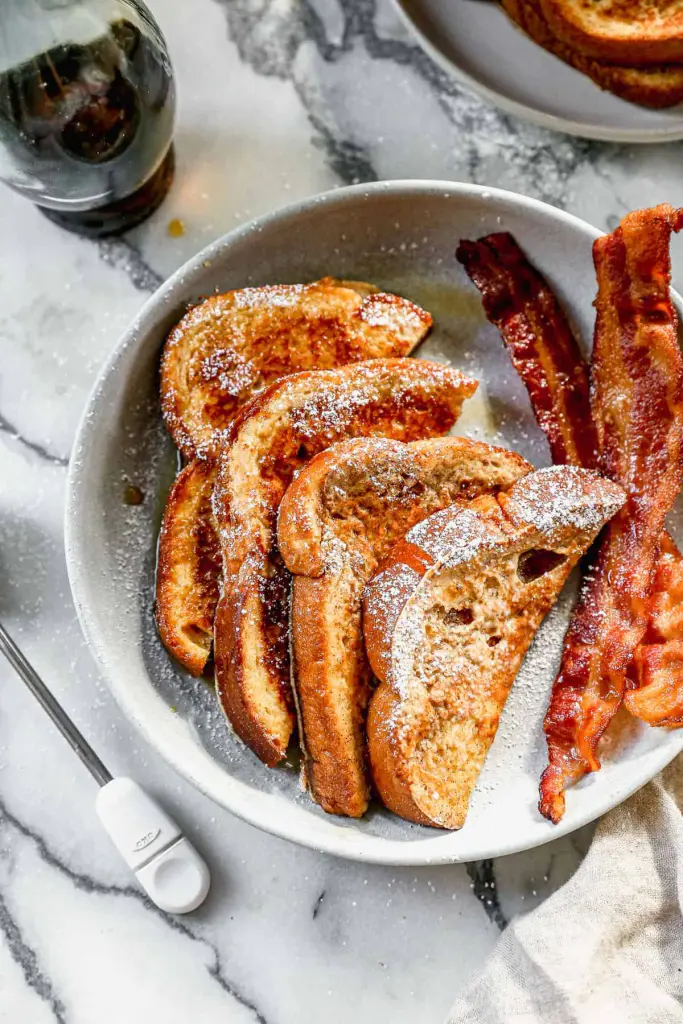
Homemade bread is best when fresh, but don't let it go to waste if it starts to dry out after 2-3 days. Here are some delicious ways to repurpose your leftover bread:
Baked French Toast Casserole: Transform your day-old bread into a luxurious breakfast dish. Soak bread slices in a mixture of eggs, milk, and spices, then bake for a crowd-pleasing morning treat.
Bread Pudding: This classic dessert is perfect for using up stale bread. Mix cubed bread with a sweet, eggy custard, add some dried fruit if you like, and bake until golden and comforting.
Classic French Toast: A quick and easy breakfast option. Dip bread slices in an egg and milk mixture, then pan-fry until golden brown. Serve with maple syrup or your favorite toppings.
Homemade Bread Crumbs: Let the bread dry out completely, then pulse it in a food processor or blender to make breadcrumbs. These can be used in countless recipes or stored in the freezer for future use.
Dried Bread Cubes for Stuffing: Cut the bread into cubes and let them dry out. These are perfect for making homemade stuffing, whether for holidays or everyday meals.
Overnight Breakfast Casserole: Combine cubed bread with eggs, cheese, and your choice of meats and vegetables. Let it sit overnight in the fridge, then bake in the morning for an easy, hearty breakfast.
Author
Editor
Punit Punjabi
is an accomplished Pastry and Bakery Chef with a dedication to perfection in every aspect of his craft. Currently serving as the Chief Baker (Chef De Cuisine) at Conrad Abu Dhabi Etihad Towers, Punit brings over 15 years of culinary experience, having worked with renowned establishments like Jumeirah at Etihad Towers and Al-Qasr.
A graduate of Agnel Institute of Food Crafts and Culinary Sciences, Punit began his journey in the culinary world with a passion for creating exceptional baked goods and pastries. His expertise extends beyond just baking; he has successfully managed bakery operations, innovated on menus, and maintained high standards of hygiene and service, ensuring customer satisfaction is always achieved.
With a strong background in both managerial and operational roles, Punit continues to inspire with his work, from menu creation and recipe development to training new chefs. His commitment to excellence is reflected in the precision and creativity he brings to every dish.